Introduction
Welcome to our comprehensive guide on creating virtual reality games using Unity! In this blog post series, we will walk you through the entire process, from understanding the fundamentals of Unity and virtual reality to optimizing and testing your game for a seamless VR experience. If you’ve ever dreamt of developing your own immersive VR game, this is the perfect place to start!
Virtual reality has been gaining immense popularity over the past few years, revolutionizing the gaming industry and offering users an unparalleled level of immersion. With Unity, a powerful and versatile game development engine, you can create stunning virtual reality experiences that captivate your players.
Before diving into the technical aspects, let’s take a moment to understand what Unity is and how it intersects with virtual reality. Unity is a cross-platform game development engine that provides developers with a robust set of tools and features to bring their ideas to life. It offers a user-friendly interface, making it accessible to both beginners and experienced developers.
Virtual reality, on the other hand, is a technology that simulates a completely immersive experience by creating a digital environment that users can interact with using specialized hardware, such as VR headsets. By combining Unity’s capabilities with virtual reality, you can create games that transport players into captivating virtual worlds.
Now that we have a broad understanding of Unity and virtual reality, let’s move on to preparing our development environment. Before you start creating your game, it’s essential to set up the necessary software and tools. In the next section, we’ll guide you through this process step-by-step, ensuring you have everything you need to embark on this exciting journey!
Understanding Unity and Virtual Reality

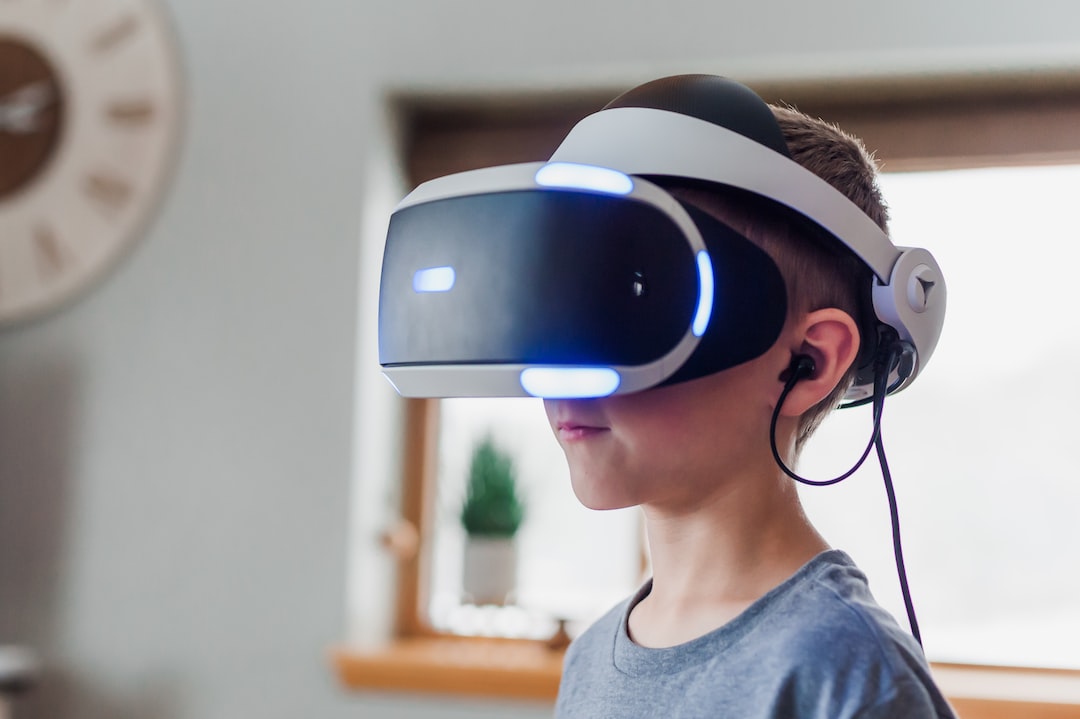
Virtual reality (VR) is an immersive technology that allows users to experience a simulated environment through a head-mounted display or other devices. It has gained tremendous popularity in recent years, revolutionizing various industries, including gaming, education, healthcare, and architecture. If you’re interested in creating your own VR experiences, Unity is an excellent game development engine to start with.
Unity is a powerful and versatile platform that enables developers to build interactive and visually stunning VR applications. It provides a range of tools, resources, and a user-friendly interface that streamlines the development process. Whether you’re a beginner or an experienced developer, Unity offers a wealth of features to bring your virtual reality ideas to life.
Before diving into the world of VR development with Unity, it’s essential to understand the fundamental concepts and principles behind both Unity and virtual reality. This will help you make informed decisions and optimize your development workflow. Let’s explore some key aspects:
1. Unity: An Overview
Unity is a cross-platform game engine developed by Unity Technologies, which allows developers to create 2D, 3D, and VR experiences. It supports multiple programming languages, including C#, JavaScript, and Boo, making it accessible to developers with different coding backgrounds.
Unity offers an extensive asset store with pre-built models, textures, animations, and scripts that you can use to enhance your VR projects. Additionally, it provides a physics engine, rendering capabilities, audio management, and a wide range of other features that are essential for creating engaging VR experiences.
2. Virtual Reality: The Basics
Virtual reality is an artificial environment created with the help of computer technology. Unlike traditional computer interfaces, VR immerses users in a simulated world, providing a sense of presence and interaction. To achieve this level of immersion, VR relies on several components:
- Head-Mounted Display (HMD): The HMD is a wearable device that contains screens to display the virtual environment and sensors to track the user’s head movements. It is the primary interface between the user and the VR experience.
- Tracking System: VR systems use various tracking methods, such as optical sensors or infrared cameras, to monitor the position and orientation of the user’s head and sometimes their body, allowing them to move freely within the virtual world.
- Input Devices: VR experiences often incorporate hand controllers or other input devices to enable users to interact with the virtual environment. These devices provide haptic feedback and allow for precise control over virtual objects.
Understanding the components of VR is crucial when designing and developing VR applications, as it influences the user experience and the interactions you can implement within your virtual world.
By grasping the basics of Unity and virtual reality, you’ve taken the first step towards creating your own immersive experiences. In the next part of this blog series, we’ll explore how to set up your development environment, ensuring you have all the necessary tools and assets to start building your VR game.
It is the primary interface between the user and the VR experience.
Preparing Your Development Environment

Before diving into creating your virtual reality game, it is important to prepare your development environment to ensure a smooth and efficient workflow. In this section, we will guide you through the necessary steps to set up your tools and resources.
1. Installing Unity
The first step in preparing your development environment is to install Unity, a powerful game development engine that provides a range of tools and features specifically designed for virtual reality experiences. Unity offers a user-friendly interface, a vast library of assets and plugins, and extensive documentation and community support.
To install Unity, simply visit the official Unity website and download the latest version of the software. Follow the installation instructions provided, making sure to select the necessary components for virtual reality development. Unity supports various VR platforms, including Oculus, HTC Vive, and Windows Mixed Reality.
2. Setting up VR Hardware
Once you have Unity installed, the next step is to set up your virtual reality hardware. This involves connecting your VR headset, controllers, and any other peripherals to your computer. Make sure to follow the manufacturer’s instructions for proper installation and setup.
If you are using a PC-based VR system, such as Oculus Rift or HTC Vive, you will need to connect the headset to your computer via HDMI and USB cables. Additionally, you may need to install specific VR software or drivers provided by the VR headset manufacturer.
For standalone VR systems, such as Oculus Quest or HTC Vive Focus, the setup process may vary. Refer to the respective user manuals or online resources for detailed instructions on setting up your specific hardware.
3. Configuring Unity for Virtual Reality
With Unity installed and your VR hardware connected, it’s time to configure Unity for virtual reality development. Unity provides built-in support for VR, making it easy to create immersive experiences. Here are a few key steps to get started:
- Create a new Unity project or open an existing one.
- Go to the Player Settings by selecting Edit > Project Settings > Player. In the Inspector window, navigate to the XR Settings section.
- Enable Virtual Reality Supported by checking the corresponding checkbox.
- Add the desired VR SDKs for the platforms you intend to target. For example, if you are developing for Oculus Rift, click the + button and select Oculus from the list.
- Configure additional settings, such as the target VR device, rendering options, and input settings, based on your project’s requirements.
- Save the Player Settings and you are ready to start developing your virtual reality game!
4. Gathering Additional Resources
In addition to Unity and VR hardware, there are several other resources you may find helpful during the development process. These include:
- VR SDKs and plugins: Explore the available VR software development kits (SDKs) and plugins that can enhance your VR game development. These tools provide additional functionalities, such as hand tracking, spatial audio, and advanced physics simulations.
- Asset stores: Unity’s asset store is a treasure trove of ready-made assets, including 3D models, textures, animations, and sound effects. Utilizing pre-made assets can save you time and effort in creating your game environment.
- Tutorials and documentation: Unity’s official website offers comprehensive tutorials, guides, and documentation specifically tailored for VR development. Take advantage of these resources to learn new techniques, troubleshoot issues, and gain insights from experienced developers.
- VR community forums and communities: Join online forums and communities dedicated to VR game development to connect with like-minded individuals, share ideas, seek advice, and collaborate on projects. These communities can be invaluable sources of support and inspiration.
By setting up your development environment properly and gathering the necessary resources, you are well on your way to creating an immersive virtual reality game. Don’t be afraid to experiment, learn from your mistakes, and adapt your workflow as necessary. With dedication and perseverance, your virtual reality game will come to life and provide players with unforgettable experiences.
Refer to the respective user manuals or online resources for detailed instructions on setting up your specific hardware.
Creating the Game Environment and Assets

Now that you have set up your development environment and gained a basic understanding of Unity and Virtual Reality, it’s time to dive into the exciting process of creating the game environment and assets for your virtual reality game.
Creating a compelling and immersive game environment is crucial to providing an enjoyable and engaging experience for your players. In this section, we will explore the steps involved in designing and building your game environment, as well as creating the necessary assets.
1. Conceptualizing Your Game Environment
Before you start creating the actual assets, it’s important to have a clear concept of what you want your game environment to look like. Take some time to brainstorm ideas, sketch out rough designs, and consider the overall theme or ambiance you want to convey.
Think about the different elements that will make up your game environment, such as landscapes, buildings, characters, objects, and textures. Consider the visual style, color scheme, and lighting that will contribute to the atmosphere of your game.
2. Building the Game Environment
Once you have a solid concept in mind, it’s time to start building your game environment in Unity. Utilize Unity’s powerful tools and features to create and manipulate various objects, terrains, and structures.
Start by creating a terrain or importing a pre-made terrain asset. Sculpt and paint the terrain to match your desired landscape, adding hills, mountains, valleys, or any other geographic features that suit your game’s theme.
Next, place buildings, structures, and objects within the game environment. Use Unity’s asset store or create your own assets using 3D modeling software like Blender or Maya. Ensure that the scale and proportions of the assets are appropriate for your virtual reality experience.
Pay attention to the details when building your game environment. Add foliage, rocks, water bodies, or any other elements that enhance the realism or atmosphere of your world. Experiment with different textures and materials to achieve the desired visual effects.
3. Designing Game Assets
In addition to the game environment, you will also need to design and create various assets for your virtual reality game. These assets can include characters, objects, weapons, vehicles, or any other interactive elements.
Consider the functionality and purpose of each asset. Determine how they will interact with the player and the environment. Sketch out the designs, create 2D concept art, or use 3D modeling software to bring your assets to life.
If you have limited experience with 3D modeling, don’t worry. There are plenty of online resources and tutorials available that can help you get started. Unity also provides a range of asset creation tools and plugins to simplify the process.
4. Adapting Assets for Virtual Reality
When creating assets for virtual reality, it’s important to consider the unique requirements and constraints of the medium. VR interactions and experiences can be more immersive and impactful, but they also require careful optimization to ensure smooth performance.
Make sure that your assets are optimized for virtual reality by reducing polygon counts, optimizing textures, and utilizing LOD (Level of Detail) techniques. Test your assets within the virtual reality environment to ensure that they perform well and don’t cause any discomfort for the players.
5. Audio Design
Audio plays a crucial role in creating an immersive virtual reality experience. Consider adding background music, sound effects, and spatial audio to enhance the atmosphere and provide feedback to the players.
Experiment with different audio techniques, such as 3D audio positioning, to create an accurate and realistic soundscape within your game environment. Test the audio within the virtual reality environment to ensure that it matches the player’s position and movement.
Remember to also consider the performance impact of audio in virtual reality. Optimize the audio assets and implement audio occlusion and attenuation techniques to improve performance and maintain a seamless experience.
By following these steps and paying attention to the details, you can create a visually stunning and immersive game environment for your virtual reality game. Don’t be afraid to experiment, iterate, and seek feedback from others to refine your designs. Now that you have the foundation in place, it’s time to move on to the next step – implementing interactions and mechanics.
Implementing Interactions and Mechanics

Now that you have set up your game environment and created the necessary assets, it’s time to dive into the exciting part of implementing interactions and mechanics in your virtual reality game. This step is crucial as it brings your game to life and allows players to engage with the virtual world you have created.
When it comes to interactions, there are various ways you can approach it depending on the type of game you are building. One common interaction method is using hand gestures or controllers to manipulate objects within the game. This can be achieved by leveraging Unity’s input system and integrating it with your virtual reality hardware.
Unity provides a powerful framework for handling input events such as button presses, joystick movements, and hand gestures. By using Unity’s event system, you can easily capture these input events and map them to specific actions within your game. For example, you can assign a button press to pick up an object or perform a specific action.
Another important aspect of implementing interactions is designing intuitive mechanics that enhance the overall gameplay experience. Think about how players will navigate through your virtual world, interact with objects, and solve challenges. Consider incorporating elements like teleportation, grabbing and throwing objects, or even using virtual tools and weapons.
However, it’s crucial to strike a balance between interactive mechanics and the limitations of the virtual reality hardware you are targeting. While it’s tempting to create complex interactions, keep in mind that some hardware may have restrictions on the number of tracked objects or the accuracy of gesture recognition.
To ensure a smooth and immersive gameplay experience, it’s essential to thoroughly test your interactions and mechanics. Put yourself in the shoes of the player and try out different scenarios to identify any potential issues or areas for improvement. Consider gathering feedback from other developers or even organizing playtesting sessions to get valuable insights from a variety of perspectives.
Remember, implementing interactions and mechanics is an iterative process. Don’t be afraid to experiment, iterate, and refine your gameplay mechanics until you achieve the desired level of immersion and engagement. This is where the flexibility and adaptability of Unity really shines, allowing you to make adjustments and improvements as you go.
As you progress with implementing interactions and mechanics, always keep the end-user experience in mind. Strive to create a game that captivates and engages players, providing a seamless virtual reality experience that leaves a lasting impression. With Unity’s robust development tools and your creativity, the possibilities are virtually endless!
Strive to create a game that captivates and engages players, providing a seamless virtual reality experience that leaves a lasting impression.
Optimizing and Testing Your Virtual Reality Game

Now that you have created your virtual reality game, it’s time to focus on optimizing and testing it to ensure a smooth and immersive experience for your players. In this section, we will discuss various techniques and strategies you can employ to optimize your game’s performance and how to thoroughly test it before releasing it to the public.
Optimizing Performance
One of the key aspects of creating a successful virtual reality game is optimizing its performance. VR games require a high level of processing power, so it’s essential to ensure that your game runs smoothly on different VR platforms and devices. Here are some tips to help you optimize your game:
- Optimize your assets: Reduce the complexity of your 3D models and textures to minimize the processing power required. Use techniques like LOD (Level of Detail) to render lower-resolution models when they are farther away from the player’s viewpoint.
- Use occlusion culling: Implement occlusion culling techniques to avoid rendering objects that are not visible to the player. This can significantly improve performance by reducing the number of objects that need to be rendered.
- Implement level streaming: Divide your game world into smaller sections and load them dynamically as the player moves through the environment. This can help improve performance by reducing the amount of data that needs to be loaded and processed at once.
- Optimize shaders and lighting: Use simplified shaders and lighting techniques to reduce the processing power required for rendering. Avoid using expensive effects and ensure that your lighting setup is optimized for performance.
Thorough Testing
Testing is a crucial step in the development process to identify and fix any bugs, glitches, or performance issues in your virtual reality game. Here are some testing strategies to consider:
- Functional testing: Test all the game mechanics and interactions to ensure they are functioning as intended. Verify that the player’s movements, interactions, and object physics are smooth and accurate.
- Compatibility testing: Test your game on different VR platforms and devices to ensure compatibility and performance across various hardware configurations. Pay attention to performance differences and adjust your optimization techniques accordingly.
- User testing: Involve a group of users to playtest your game and provide feedback. Observe their experiences and gather their opinions to improve gameplay, address any discomfort issues, and enhance overall user satisfaction.
- Performance testing: Monitor your game’s performance metrics, such as frame rate, load times, and memory usage. Optimize any areas that are causing performance bottlenecks to ensure a smooth and immersive experience for your players.
Remember, optimization and testing are iterative processes. Continuously monitor and optimize your game’s performance throughout the development cycle to ensure a high-quality VR experience for your players.
By optimizing your virtual reality game and conducting thorough testing, you increase the chances of creating an immersive and enjoyable experience for your players. Take the time to analyze performance bottlenecks, adjust your game assets, and gather feedback to refine and polish your game. With careful optimization and testing, you can deliver a virtual reality game that captivates and engages players like never before.
Verify that the player’s movements, interactions, and object physics are smooth and accurate.
Conclusion
In conclusion, embarking on the journey of developing a virtual reality game with Unity can be both exhilarating and challenging. Throughout this blog post, we have covered several key aspects that are crucial to creating a successful VR game.
We began by understanding the fundamentals of Unity and virtual reality, diving into the concepts and technologies that underpin this exciting field. By grasping the basics, you are better equipped to navigate the vast possibilities of VR game development.
Next, we delved into preparing your development environment, ensuring that you have the necessary tools and resources at your disposal. Setting up Unity and configuring your VR headset can seem daunting, but with the right guidance, you can quickly get up and running.
Creating the game environment and assets is the heart of your VR game. We explored various techniques and best practices for designing immersive environments and crafting realistic assets. Remember, attention to detail and creativity are key ingredients that will elevate your game to new heights.
Implementing interactions and mechanics is where the magic happens. This stage involves coding the behaviors of objects, creating intuitive controls, and designing captivating gameplay mechanics. It’s a phase that requires experimentation, iteration, and a healthy dose of adaptability.
Optimizing and testing your virtual reality game is crucial to ensure a smooth and enjoyable experience for your players. We discussed strategies for optimizing performance, reducing motion sickness, and thoroughly testing your game across different platforms and devices.
Now, as we reach the conclusion, it’s time to reflect on the journey you’ve embarked upon. Developing a VR game is no small feat, and it requires dedication and perseverance. However, the rewards of creating a virtual reality experience that captivates and entertains others are immensely gratifying.
So, take the knowledge and skills you’ve acquired through this blog post and dive into the world of VR game development. Experiment, innovate, and push the boundaries of what is possible. With Unity as your tool and your imagination as the driving force, the possibilities are endless.
Remember, the road may be challenging, but with each step, you’ll grow as a developer and bring your vision to life. Embrace the hurdles, learn from your mistakes, and celebrate your successes. With determination and passion, you can create virtual reality games that leave a lasting impression.
Now, go forth and embark on your VR game development journey. The world is waiting to experience your creativity in the immersive world of virtual reality!